5 Common Mistakes In Food Photography And How To Fix Them:
#1 Bad Lighting
A very common mistake in food photography is shooting in the evenings using artificial lights that most of us have in our houses. It gives a very unattractive yellowish color to the image and the quality of those photos are often suffer as well.
Solution: Try to shoot using day light. Shoot indoors close to the window. Choose the time of the day when there’s no direct harsh light but rather soft light.
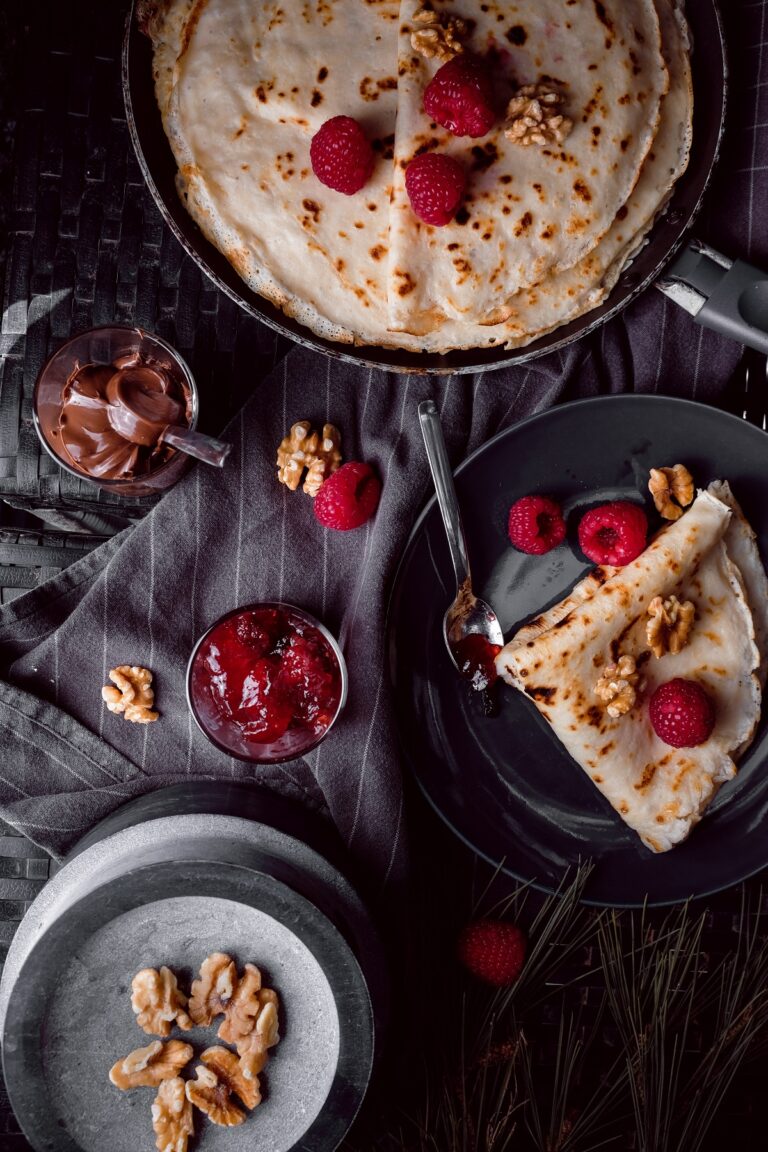
In the image on the right of pancakes I shoot next to the window. The light comes from the side and beautifully illuminates the scene. Light is crucial in photography and food photography is not an exemption

#2 Not Using Props:

A second common mistake in food photography is not using props for styling your dish. Props help you to tell the story behind the dish and to help to show the viewer the atmosphere. The best food photography always tell a story weather it’s with human interaction like hands in the photo or with props that you use.
Solution: Keep the ingredients that been used in a dish and place them to style the dish. Think about the atmosphere that you want to create and what will help you to create this atmosphere.
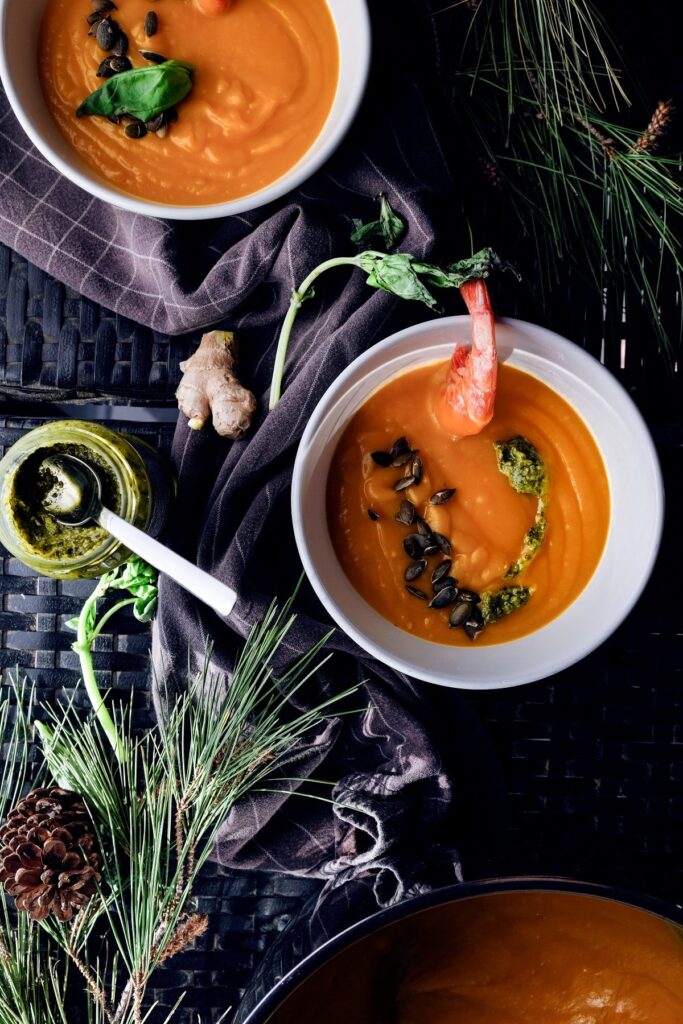
In the image of a pumpkin soup on a left, I used cones and brunches to show a winter mood. A kitchen towel is placed to wrap the main dish and to give a cozy feeling to the scene.
#3 Having your food look like it’s sliding off the table or off the plate
This is a common mistake that many food photographers are doing, and not just beginners.
Solution:
1. Try to shoot at 90 angle or 45-degrees angle. If you are shooting at the angle between 45 and 90, you are likely to have this weird sliding effect and weirs proportions.
2. use a grid and a level on your camera or on your smartphone (available on new iPhones). It will make sure that you hold the camera straight and leveled.
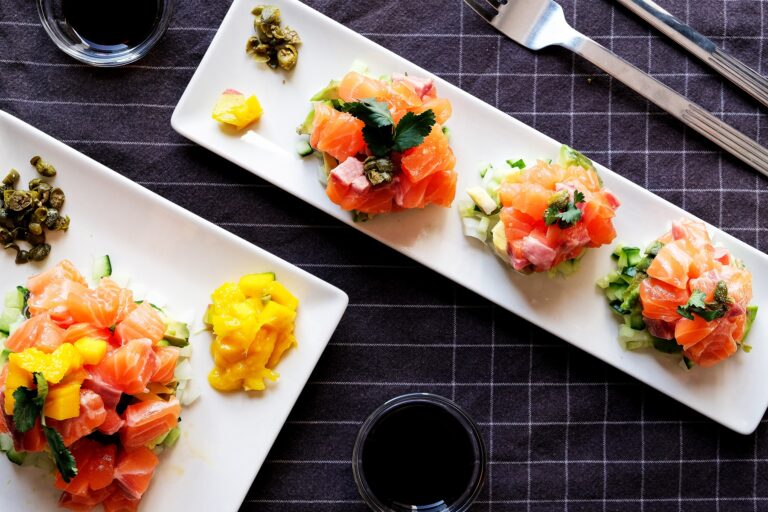
The sashimi image was shoot at 90 degrees angle

#4 Bad Composition

Mastering a composition is a must in food photography. Composition is an important element in all types of photography as well as videography, painting, web and graphic design and more. If you are coming from one of those fields, you might have it naturally, if not, dont worry, there are rules to help you out.
Solution:
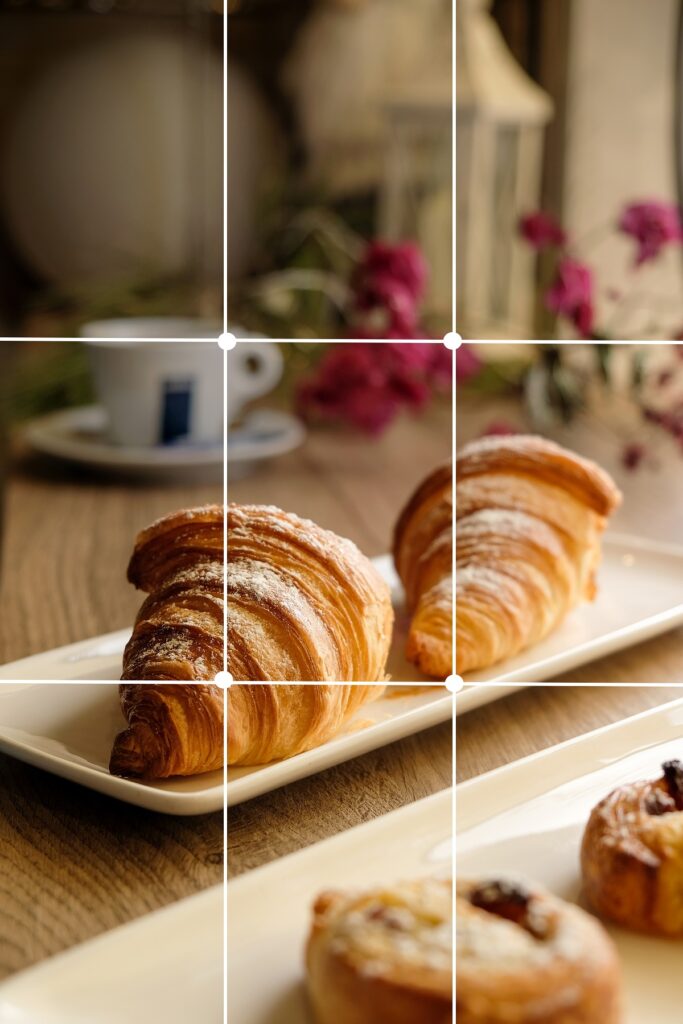
Rule of thirds: This one is the most famous one and it applies not just in food photography but photography in general as well as arts and design. It suggests to use a grid that divides an image to 9 equal size squares. Place important details on those lines or in the intersection points of those lines. It creates a balanced composition and indicates to the viewer what are the main objects of the image. In the food photography, you can implement this rule by placing the main dish on the intersection of those lines like in the example here. To make it easier to implement, simply make sure that the screen of your camera or smartphone shows the greed. You will find it in the camera settings on the phone or screen settings on your camera.
In my practical food photography course for beginners I explain more about this rule as well as additional 6 composition techniques used in food photography
#5 Skipping postproduction
Professional food photographers always, but always post product their images before posting them or before providing them to the costumers. Slight changes make big difference.
If you want to make food photography your career, remember: You are always going to be judged by your worse images.
I use photoshop for my editing. You can use lightroom as well. There is a free version of lightroom as an app and I highly recommend it.
I usually slightly raising contrast and making color adjustments and make them more pop. I can also lighter or darker some parts of the image to help viewer to be focused on the main dish.
My full food photography editing process can be seen in my course. I made screen recordings with explanations and showing the whole process for 3 different images.

Hi, this is a comment.
To get started with moderating, editing, and deleting comments, please visit the Comments screen in the dashboard.
Commenter avatars come from Gravatar.